Tuesday, June 17, 2014

Milkmaid Braid Tutorial

Since it's the summer time and it's been extremely hot out, i've been becoming addicted to this hair style. It's the milkmaid braid and it looks complicated, but it's super easy to complete! :) I do advise that this is much easier with long hair. My hair is sort of long, so i have no idea the outcome of short or medium hair!

The first step is to brush out your hair. I would suggest doing this when your hair is a day or two old. Not only is it a easy updo when your hair isn't that clean, but also you don't have to use as many bobby pins because they tend to hold the hair better.


Then, you're going to part your hair (in the middle or the side, it doesn't make a huge difference. For the sake of this post, i just kept my part.) After you part it, just braid each side normally like you're braiding two braided pig tails.


Now you can skip this step, but what I like to do is pull strands of my braid to loosen it up a bit and make it look bigger, so they braid itself will look thicker once I pin it up.


Next, you're going to take one braid and wrap it around your head, making sure it's as flat against your head as possible, and is also tight to it. Then you're going to take a bobby pin and pin one on the end where your unbraided hair is and pin it to your head. You can put as many bobby pins as you feel are necessary to keep it in place, but I usually put one there, and then pin the bottom part of the braid to my head as well so it doesn't become loose.


You're going to repeat the exact same thing with the other braid. When you take it over, try and place it either in front or behind the other one you just pinned. I usually place mine in front. This not only hides the end pieces of hair from the other braid, but it also makes it look thicker.


And that's it for this hair style! If you want to, you can pull out some hair from the front as like fringe and either straighten it or curl it. I like to straighten mine because I feel it fits the hair style better, but curling it looks cute too!


And voila! The final product :) I hope you guys enjoyed and thought this was a helpful tutorial! If you have any questions or suggestions, just leave a comment below! Thanks :)


Smokey Eye Tutorial

Hi guys! So I've realized I haven't posted anything in awhile, i've just been so busy. However, today I had a lot of free time so I decided to do a smokey eye tutorial for you, so i'm just going to dive right in! (I do want to apologize, as you guys will see, I have not done my eyebrows today so they look a bit rough)

First, you have to prim your eyelid. I used CoverGirl eye primer. You don't necessarily have to do this step, I just find it makes the eye shadow stay on longer and not get everywhere.


The next step is to apply winged eyeliner. I suggest using liquid eyeliner, I found it tends not to smudge as the day goes on. I used Maybelline's master precise liquid pen. You want to make it kind of high and thick because it does blend into the smokey part.


The next step is to find a good black. I stick to more solid blacks, and stay away from the shimmery and sparkly ones, mainly because I feel those would be better if you were going for a night out to like a club or something, which I do not do. I got my color from a palate I bought from Forever 21 a couple of years ago.


Then, you're gonna go ahead and apply one dot of the black on the outer corner of your eye. You can choose to either use a brush, or your finger will do just fine. Sometimes, I feel the finger can be a little hard, but if you can get it, it looks the best using your finger.


Then you're going to add another one, going along the line of where your crease is. Now keep in mind, you don't want to add a whole lot of product at first because it is black. If at the end you find it too light, you can go back and touch it up, but you don't really want it too dark.


Next, add one more dot and kind of swoop it along your crease line very lighting so it doesn't awkwardly stop in the middle of your eye.


You can go back and touch it up a bit, add some highlight to your brow bone, the you just add mascara and you're all finished!


I really hope you enjoyed this, and I hope I explained each step thoroughly. It's honestly not that hard once you get the hang of it! If you guys have any questions, or if I was unclear in some areas, just leave a comment below and I'll get back as soon as possible :) Also if you have any other suggestions leave those comments as well!!


Sunday, March 9, 2014

Sweet 16!

Hi guys! So, last night I went to a sweet 16 party and I thought I'd show you what I wore and tell you about it in case any of you were interested in throwing one and wanted ideas!

Unfortunately, I don't have a picture of my entire outfit, just the top half, but she had this cute little photography place set up on the side to take silly pictures! Here's one that I took; I'm the one on the far left in the black and white stripped dress!


It's a circle skirt dress, or a skater dress, with 3 quarter length sleeves and a cross back. I purchased it at PacSun in early January. It was around $35 if I remember, but it was part of a store sale they had going on. I paired in with a simple silver necklace, black tights, and black heels that had silver bottoms and a cute black bow on top! I also wore my hair up in a curly pony tail, one because it was really hot in there, and two because I wanted to show off the cross back!

Textured Cross Back Dress

Here is a picture of the back of my dress I found online. I really like it. It was a little tight, which made it kind of hot to wear, and it was an off the shoulder top, so it was probably not the best to be dancing in, but I still think it's super cute!

The party was at a hotel where she rented out the ballroom. She made it black and white themed and wore a gorgeous red dress. (She's the one in top picture with the red dress). She had a really great DJ with a dance floor in the middle and tables all around. It was also like a masquerade party, but most people ended up taking off their masks. She also had many varieties of food which I enjoyed because if you didn't like one thing, there was tons to choose from. Everyone got a little goody bag of candy too before they left which was nice. She had this beautiful black and white cake that was red velvet followed by cupcakes too, just in case there wasn't enough cake. I had a lot of fun because there was around 250 people who came and we all just danced or hung out and everyone seemed to be enjoying themselves!

If you were thinking of having a party and wanted any ideas, feel free to ask me! :) Byeeee! <3

Thursday, January 16, 2014

My Collection!

So about a month ago, I started to learn how to knit and crochet, and so far I've made some pretty cool things. I've obviously gotten better the more I've done it, but it honestly takes up such less time and its for a much cheaper price.

I prefer crochet over knitting. I think it looks better and it definitely takes less time. Also, you have more styles you can create with crochet, plus it's a lot easier I feel.

Here are the scarves I've made so far. They're all crocheting, and I did make a knitted one too, however, I'm not going to show it because it turned out terrible. It was the first one I made and it curled up :( boo.


Also, the pink one in the bottom left corner, I actually made that by a technique called "arm knitting". It's quite simple, actually. It takes about 30 minutes (the first time takes a little bit longer). There's tutorials on how to make all of these and they take like no time. The only one that took really long was the black one in the bottom right corner, but it turned out super cute!

Thursday, January 9, 2014

Forever 21 Mini Haul

Earlier today I went out shopping because I needed to buy my friend a gift for her birthday. Turns out, I ended up buying stuff for myself - I just couldn't resist.

The first thing I bought were these really warm printed leggings.


They have like grey fuzzyness on the inside, but it's not overbearing. I haven't worn them outside, but they really do keep me warm inside. Those were $11.80.

The next thing I bought was a cute little make-up bag to stick in my purse. That was $6.80. It's white with gold circles on them.


Then I bought a nail polish. The color is Sage and it looks sort of like a mint green, but a little darker. It's kind of hard to tell from the picture, but that was $2.80.


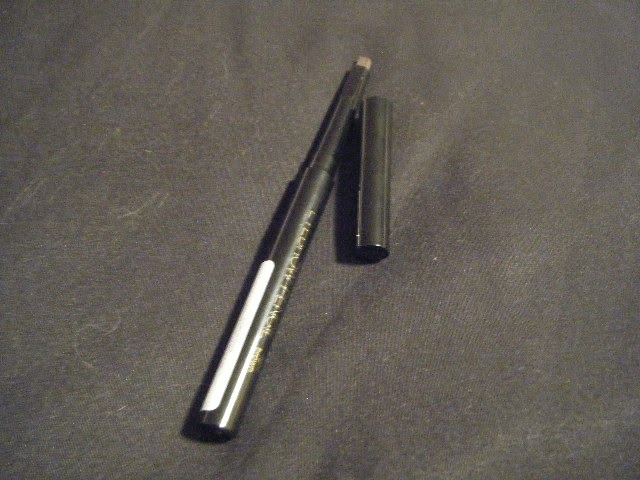
Then I bought an eyebrow pencil in the color light brown, which I believe was only $.99. Total bargin.


I also got a gel liner for $.99, which makes sense because there's not really a whole lot in the container.


Now, I normally don't really use these because sometimes I feel like they can be a bit annoying, but they were $.99 so I thought, why not.


They're little studs that you can apply to your nails after you put on nail polish and they're not very tall, or stick out, so I thought I'd try them.

The last thing I got was a shirt.


It's black and sort of a greyish white striped shirt. The sleeves kind of puff out at the shoulder and go down 3/4 of the way. Then it had a cute little lace collar and I just thought it was really cute! This was only $8.99 which was a pretty nice price I thought.

So that's what I bought on my little outing, I also bought my friend a lot of things as well and yeah!

*Note: I am in no way showing off what I have bought, just simply showing you in case you're interested or would like to buy it yourself.


Tuesday, January 7, 2014

Getting Crafty :)

So I've been out of school for a couple extra days due to snow and wind chill factors, so I made a lot of little ear warmer headband things! I think they're really cute and they're quite simple to make - but they might take sort of long, depending on what style you want.

I made a few different types, some are just normal and some have bows. It's great because you can make it how snug you want it, or how thick you want it and what color!

Here are the ones I made :


Then I also got a little carried away and tried to make one with cat ears. It didn't turn out the best that I wanted, but I still like it. It's quite cute. I think just next time I'll have to use thicker yarn than what I did!


The flash kind of made it look weird, but it's just a plain black ear warmer hat. I actually knitted this one, the others I crocheted. I also made some scarves that I'll try and take pictures and upload later! They're really simple to make! If you want to try, you can just ask me, maybe I'll make a video or something!


Saturday, January 4, 2014

Recent Buys

So I recently just bought a few things at the store and I absolutely love them! These are all purchasable at any drug store or super market. (I just bought mine at Meijer if you have one).

One thing was Beach Babe Texturizing Sea Salt Spray.


It's really great at giving your hair nice volume and texture which I love! And it smells great too :) Sort of like the beach with a little coconut smell to it. It's great for if you don't really have time to do anything with your hair, you just spray some of this in, give it a few scrunches, and you're good to go!

Now, I also bought a nail polish. It's Fiji by Essie, which I currently have on my nails.


Some people say it really only looks good if you have a decent tan if you've just been away on a holiday. But, I'm quite pale and I still think it looks super pretty on! Now, obviously it's not a winter color, but I still think it's nice :) It's sort of a lighter pinkish color that looks darker once you put on about 2 coats on. Also this picture is not the best at showing what it really looks like, but I just really like it!

 The last thing I bought was a liquid liner. Now, it has absolutely nothing on the container, so I don't know the exact name, but it was L'Oreal in the color Black.


This is the first liquid eye liner I've bought myself so I'm no quite sure how to use it or how it looks. This one sort of looks like gel when you put it on, or maybe I just put a little too much on. I actually like it, I mean I haven't tried any others, but I really like how liquid eyeliner doesn't smear. I use to use gel or pencil and after awhile, it would end up on my upper lid! The only thing I don't like about it is the brush. It's a longer one but it's a little thicker than I thought it would be so it's kind of hard to apply, but I should get use to it I guess.